Who doesn’t love the creamy, seductive texture of cheesecake, baked or raw? I can eat it till the cows come home.
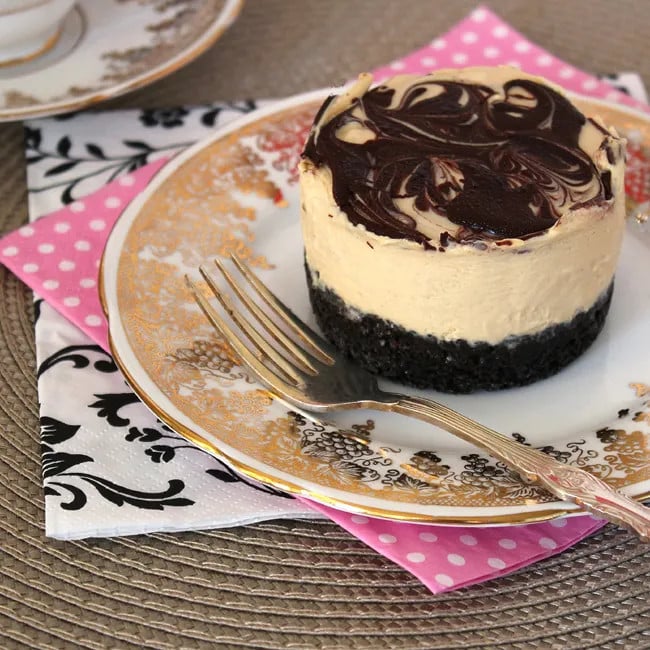
And I love the fact that you can keep them interesting by mixing and matching the bases and the toppings – think lemon cheesecake with a light shortbread base, or a Kahlua cheesecake with a dark chocolatey base. Here, I’ve gone with individual cheesecakes (just because I can!) flavoured with Bailey’s Irish Cream and coffee, paired with an Oreo base – divine!
Thanks to Foodiebaker for the original version which I’ve further adapted. I halved the cream cheese content and though I kept the original amount of Oreo base, next time I’ll be reducing this too – from 200g Oreo cookies to 150g and from 100g melted butter to 75g. But if you love a nice thick crunchy base, stay with the recipe below! And just because I’m not a fan of gelatine, I took this out altogether – you won’t get as firm a texture and you’ll need to keep it refrigerated right up until serving. Finally, I also added vanilla and coffee as flavorings. Hope you enjoy!

MINI BAILEY’S IRISH CREME CHEESECAKES
Equipment
Ingredients
- 7 oz Oreo cookies
- 3.5 oz butter, melted
- 6.7 fl oz heavy cream
- 1 tsp vanilla extract
- 1/2 cup Bailey’s Irish Cream or to taste
- 1-2 tsp instant coffee dissolved in 1 teaspoon hot water
- 8.8 oz cream cheese, softened at room temperature
- 1/2 to 2/3 cup caster sugar, superfine, to taste
- 0.7 oz dark chocolate, melted
Instructions
- Using a food processor, process the Oreo cookies until they resemble fine crumbs. Add the meltedbutter into the cookie crumbs and stir until they are all combined. Divide the mixture between thegreased individual cheesecake pans (I used six 3/4 cup capacity pans) and pat down firmly* (seenote about the option of baking the bases). Pop the pans into the refrigerator while you carry on.
- Whip the cream and vanilla extract to a firm peak stage. Using an electric mixer, beat the creamcheese and the sugar until light and fluffy. Add the Bailey's Irish Cream and the coffee mixtureinto the cream cheese and mix together. Fold in the whipped cream and pour the mixture into thecheesecake pans.
- Over a double boiler and a low heat, melt the chocolate. Gently scoop small dollops of the melteddark chocolate over the cream cheese mixture. Using a long tooth pick, swirl decorations on thecheesecakes.
- Set for several hours, but preferably overnight in the fridge until firm. Alternatively, you can popthem in the freezer for a quick set.**
- When ready to serve: dip a palette knife into hot water and dry it. Run the palette knife along theedges of the cheesecake and remove the pan carefully and gently. Place it on a serving plate,allow it to come to room temperature, and serve.


Whoa, that’s a great looking cheesecake!
Thanks! It really was, and actually even better the following day.
What size springform pan did u use?
Hi Michelle. I used a six pan cheesecake pan – the capacity of each pan is 3/4 cup.
Congratulations! I have nominated your blog for the Versatile Blogger Award. If interested, please pick up your award here: http://sweetbakedlife.com/2013/08/25/the-versatile-blogger-award/
Thanks Sheila – I probably won’t get time to follow up with the award, but I’m chuffed you nominated me!