Take a peek at any Kiwi dinner table on Christmas Day and you’ll almost always find that iconic, and most Kiwi of desserts – Pavlova.
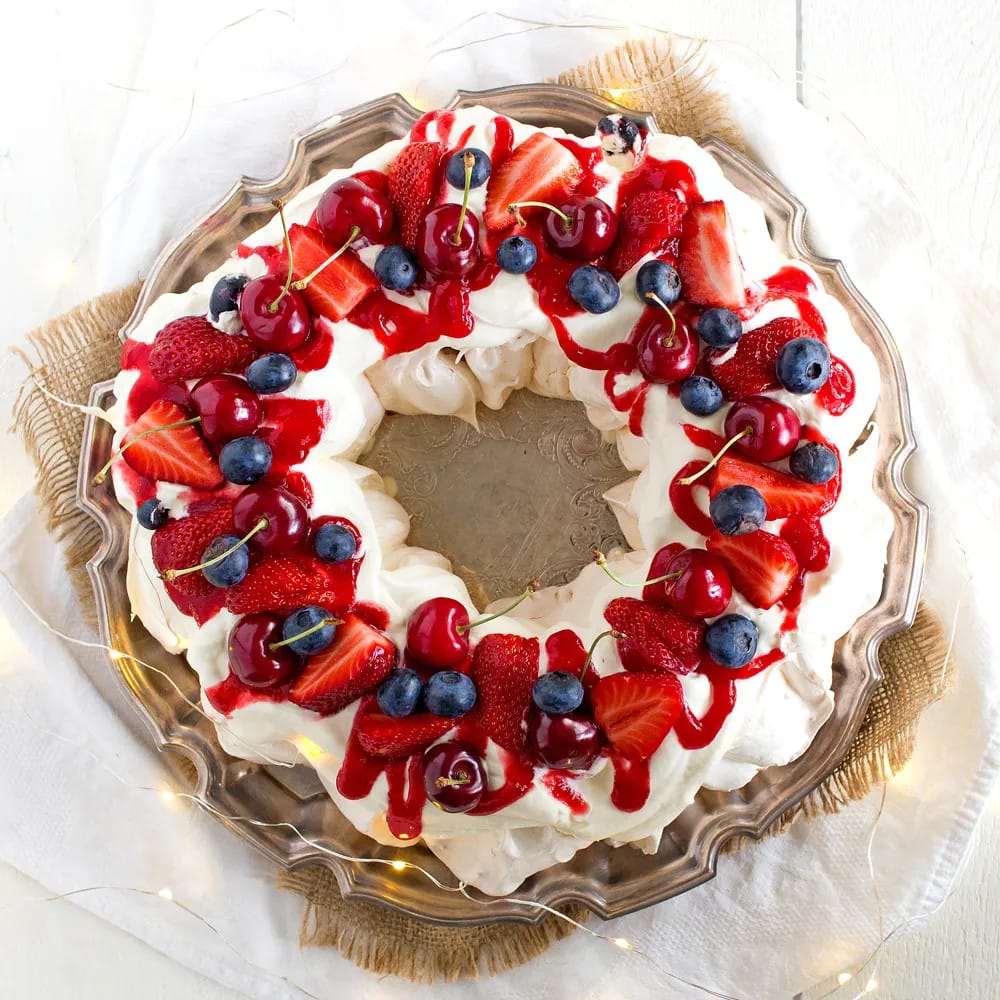
If you haven’t tried Pavlova, you’re in for a real treat – clouds of sweet marshmallow encased in crunchy meringue, topped with lashings of cream and tart fresh fruit. Simple, but classic.
For Christmas this year, I thought I’d recreate the good old ‘pav’ in a festive wreath shape complete with a berry medley. And, as berries are just coming into season down here in Kiwi-land, I was spoiled for choice. I deliberated as to whether to add some pomegranate arils as well, but I rather liked the simple effect that the cherries, strawberries and blueberries created.

I didn’t go by a specific recipe as such – pavlovas are pretty much universally made the same way and with the same ratio of ingredients. However, while the perfect pav is ideally mostly marshmallow with a thin, brittle crust, this time around I baked it lower and slower for a more robust, thicker crust to ensure the wreath wouldn’t break apart. Kind of more ‘meringue’ than ‘pav’, from a purist’s point of view.
At the last minute, I decided to make a fruit sauce to go with the fresh fruit and chose a raspberry coulis. It’s a delicious tart counterpoint to the sweet meringue and is thickened with cornflour (cornstarch) which ensures it doesn’t drip all over the place and seep into the meringue.
While I made this wreath shape specifically as a Christmas dessert, it really doesn’t need to wait for a festive occasion to be enjoyed. You can simply call it a Pavlova Ring and add whichever toppings float your boat. Enjoy, and Merry Christmas!


Festive Christmas Pavlova Wreath
Ingredients
Pavlova Wreath:
- 5 egg whites , room temperature
- pinch of salt
- 1-1/4 cup cup caster (superfine) sugar
- 2 tsp cornflour (cornstarch)
- 1 tsp white or malt vinegar
- 10 fl oz heavy cream
- Raspberry Coulis (see recipe below)
- Seasonal fruit to serve (I used fresh strawberries, cherries & blueberries)
For the raspberry coulis:
- 1 cup fresh or frozen raspberries
- 2 tbsp white sugar
- 1 tbsp orange or lemon juice (or orange liqueur)
- 1 tsp cornflour (cornstarch)
- 1/2 cup cold water
Instructions
For the Pavlova Wreath:
- Preheat the oven to 120°C (248°F).
- Place some baking paper on an oven tray and using a pencil, draw a 24cm (9.5 inch) circle in the middle of it, with a smaller 12cm (4.5 inch) in the middle of that. This will give you the guidelines for your wreath. Turn the baking paper over so the drawn circle is now underneath, but still visible.
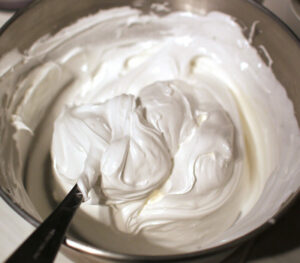
- Place the egg whites in the bowl of your electric mixer with the pinch of salt and beat the egg whites on moderate speed until they start to hold stiff peaks. A little at a time, add the sugar and keep beating on high until the mixture is very stiff and glossy (this should take around 10 minutes all up). If you rub a little mixture between your fingers, you shouldn’t be able to detect any sugar granules in the mixture once finished.
- Sift in the cornflour and add the vinegar and fold with a large metal spoon until combined.
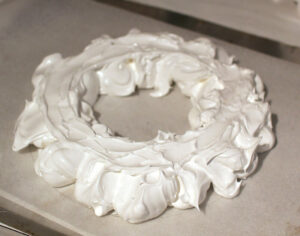
- Using a large metal spoon, dollop the mixture onto the baking paper in large dollops (in between the two circles).
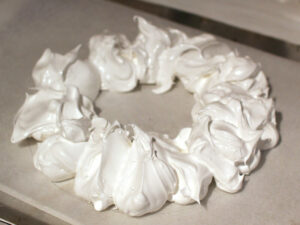
- Slightly level the top so that it creates a good surface to add the cream later on.
- Bake for 2 hours (don't open the oven in that time).
- Turn the oven off and let the pavlova cool completely in the oven, oven door closed, for several hours, or overnight.
- Transfer the pavlova to a serving plate.
- Whisk the cream to a soft peak stage and spread over the pavlova.
- Transfer the raspberry coulis (recipe below) to a squeeze bottle and drizzle over as much as you want over top of the cream. Add the berries over top and serve immediately.


For the Raspberry Coulis:
- Combine the raspberries, sugar, and orange juice (or lemon juice, or liqueur) in a saucepan.
- Whisk the cornflour into the cold water until smooth. Add the mixture to the saucepan and bring to a boil. Simmer for about 5 minutes, stirring constantly, until the desired consistency is reached (the sauce will thicken further as it cools). If it's too thick, simply add a little more water or juice. If it needs it (mine didn’t) puree the sauce in a blender or with a hand-held stick blender. Strain it through a fine sieve.
- The sauce will keep in the refrigerator for up to two weeks.
Notes
You can scale the recipe up or down – i.e. 4 eggs with 1 cup caster sugar; 6 eggs with 1.5 cups caster sugar – the cornflour and vinegar amounts remain the same.
You’ll find an extensive list of pavlova making tips on my Classic Pavlova recipe page.


A great idea for a Pavlova, now you have me thinking I could do some mini wreaths. Thanks for the recipe 🙂
Ooh, mini wreaths would be sooo cute! Have a great Christmas Lee!
Yum, I much prefer a harder crunchy crust on my pav too 🙂
Yeah, so does my family. Next time I make a standard pav, I might try the low, slow bake on it too and see how it goes.
Hmm for some reason I cannot reply to your reply to my first message and its the second time its happened. Not sure if its an issue for anyone else either – anyway
Its cooler today so I am going to have a go, I have another recipe for chocolate pudding that will use up the eggwhites so I am good to go for my offerings for the Xmas day lunch – cheers!
Hi Stacey. I’ve changed the amount of nested comments, so hopefully that works now. Glad to hear you’re all set to go for the wreath – I’m also making it again for tomorrow night – can’t wait!
FYI I made it as a straight pav, my oven is a bit hot so it was a bit browner on top but came out with a crust about 1cm thick and VERY chewy 🙂
Ooh, sounds divine! I made it again for Christmas dinner using six eggs this time.. worked well.
This is the best pavlova I have ever made!! Thank you so much for sharing this recipe! Merry Christmas! X
Hey Carmen! Great to hear!! I made it again for Christmas Eve dinner and it impressed once again. Happy Christmas to you and yours!